


"This year we’re bringing you a sew-along series to help you sew a quilted throw pillow of your own."
This year we’re bringing you a sew-along series to help you sew a quilted throw pillow of your own. To help you gather your equipment and make sure you have everything you need, we’ve put together an overview of the steps we’ll be guiding you through.
Post 1: Introduction to the project and the methods we’re going to use, as well as advice on choosing fabrics and designs. No need for any equipment for this post, but you’ll be picking out your fabrics for the front and reverse of your pillow. If you want your pillow to look professional, decorate it with a custom leather label. You can order the personalized leather labels from Wunderlabel.
Post 2: Choosing a layout and cutting your fabrics ready to sew. You’ll need grid paper and coloring pencils to mock up your design, as well as the fabrics you chose in post 1. Other supplies depend on how you choose to cut your fabric – those using rotary cutters will also need a self-healing mat and a ruler, while those using scissors will need a ruler and something to mark the fabric with (fabric marker or tailor’s chalk in a contrasting color). An iron to press your fabric might be useful too.
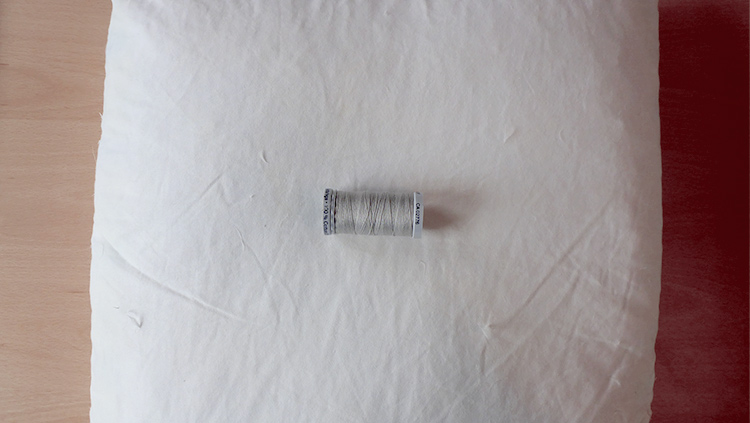
Post 3: Sewing quilt top together. In this post you’ll need the fabric you prepared during post 2, as well as thread in a matching color (we like to use a light grey with most colors, as it tends to blend well). Pins or clips will be required too, and an iron for pressing seams is helpful.
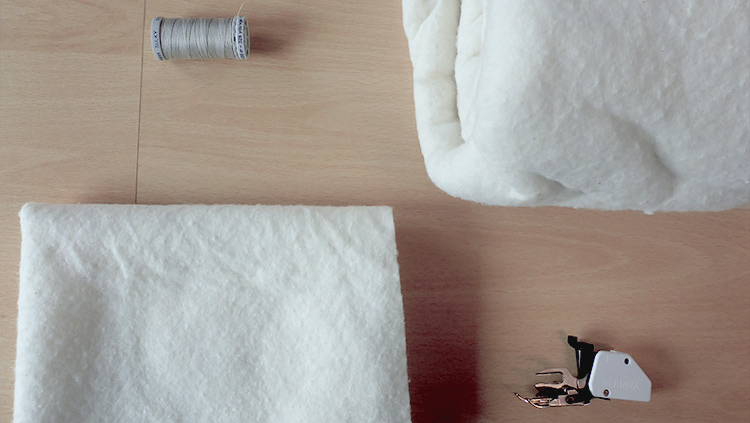
Post 4: Sandwiching pillow front and quilting. For this stage you’re going to need thread matching your fabric, the backing fabric you prepared in post 2 and quilt batting (sometimes referred to as quilt wadding). There are various different types of batting, from cotton via bamboo and wool to polyester, as well as a number of blended types. Each fibre type behaves differently and will give a different look to your quilt, so which you choose is a matter of taste – try going to your local quilt shop and feeling the different options before you choose. We’re going to quilt the pillow front with a sewing machine, using a walking presser foot to help feed the fabric through the machine. You can also quilt by hand if you’d like, but it’s a different process which results in a different feel to your quilt.
Post 5: Construction of your pillow. In this final post, you’ll need the fabric you chose for the reverse of your pillow, as well as thread in a matching color. You’ll also need a pillow insert of the appropriate size – our project is based around a 45cm (18in) insert, but if you’ve made a bigger or smaller cover don’t forget to change the insert size too!
How to Make a Quilted Throw Pillow: Post 1: Fabric
"It’s all about the fabric!!"
In this post we’ll be gathering the fabric required for the quilted throw pillow and giving you tips for finding fabrics that work well together.
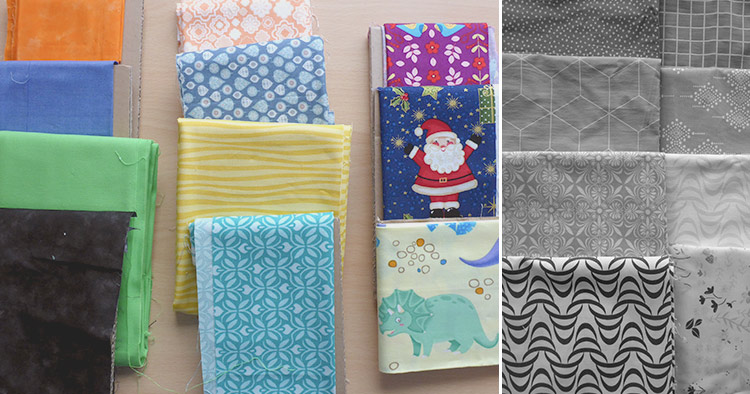
First things first – the type of fabric required. For quilting, you should start with a stable, woven cotton fabric (not a stretchy knit or jersey type of fabric). This ensures that the finished project will keep its shape properly and makes it easy to sew accurate, straight seams. There are many online quilting shops which carry a seemingly endless range of fabric designs and colors. Or perhaps you also have a local quilt shop nearby – it’s easier to compare different fabrics with each other in person if you can, though some online shops will also offer this service if you contact them. For quilting beginners, quilting cottons are an excellent place to start – avoid anything too thick, as this will make quilting your finished project much more difficult.
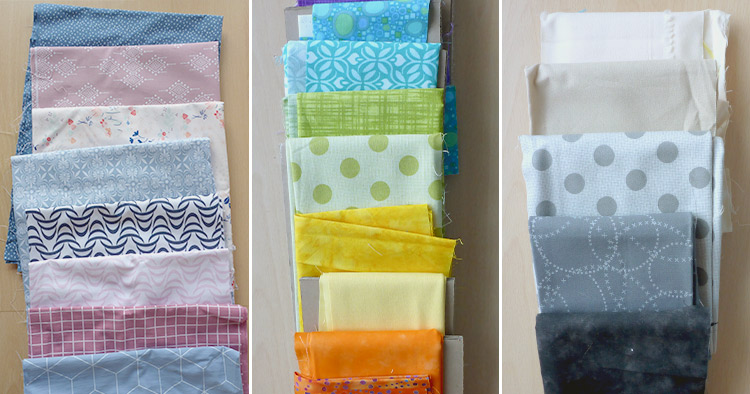
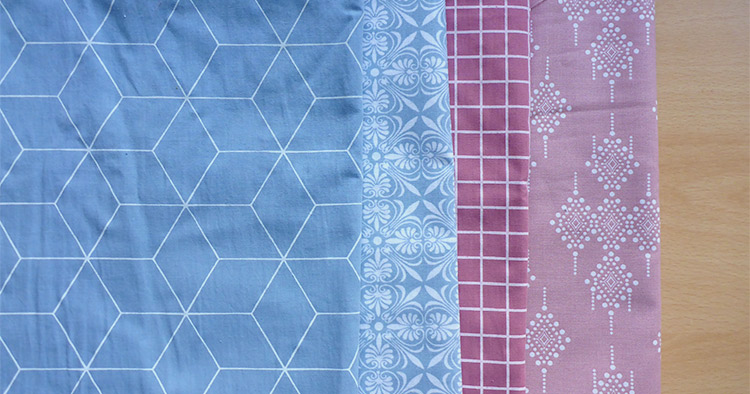
Next, decide on the colors for your pillow. The sky’s the limit here! You could try a variety of shades of one color from palest pastel to bright and strong, a combination of two or three contrasting but complementary colors, stylish neutrals or even a whole rainbow. Pinterest and quilting blogs have plenty of inspiration if you’re struggling to find ideas. We’ve chosen fabrics in blue and pink for a classy pastel look.
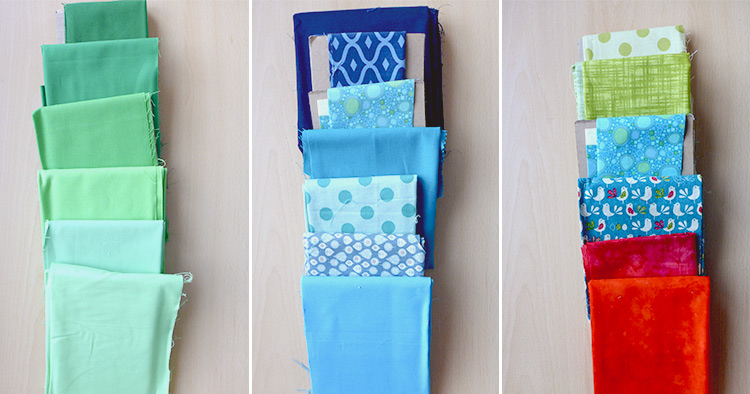
Now we need to narrow the selection down to 2-4 fabrics. If you’re using two main colors like us, keep the numbers even and choose either 1 or 2 fabrics in each color. Consider the color value of each fabric – how dark or light is it? A good way to assess this could be to snap a photo of the fabrics you’re considering and make it black and white – darker fabrics are easier to spot this way, without getting distracted by the exact shade. A quilt made from all dark fabrics or all light fabrics will have a very different look to one made with a combination of lights and darks. Think about print size, too. A solid or small-scale pattern acts as a contrast to prints on a larger scale.
Choosing quilt fabrics is all about your own taste, there are no right or wrong answers – if you like the look of a combination of fabrics, let that be your guide! As a rough guide, for a 45x45cm pillow you shouldn’t need more than two fat quarters worth of fabric for the front of your cushion (a fat quarter is a cut of fabric commonly sold by quilting shops measuring approximately 56x50cm or 18x21”).
Lastly, you’ll need to choose which fabric will form the reverse of your pillow. Pick a good match to the fabrics you chose for the front of the cushion or simply buy extra of one of the fabrics to use for the reverse. For the reverse, you will need 1m of fabric – this includes a square to use as the backing for the front of the pillow, which will be inside the cushion and not seen when finished but makes it much easier to quilt.
Stay tuned for the next post in this series coming next month!
How to Make a Quilted Throw Pillow: Post 2: Design & Cut
"So many quilt patterns, so little time!"
You will need:
- The fabrics you chose last month
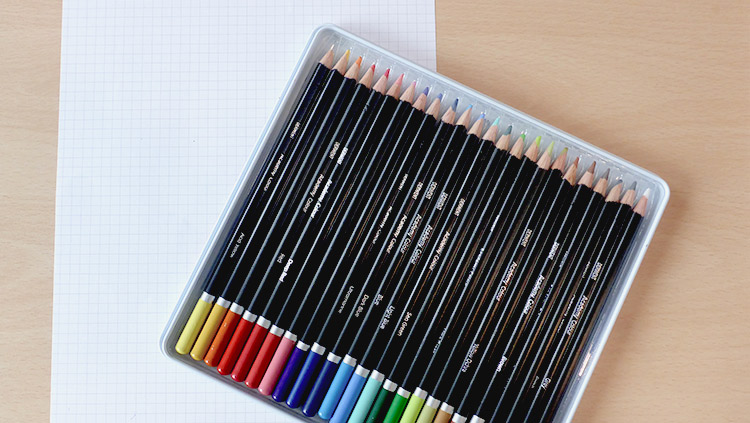
- Grid paper and coloring pencils
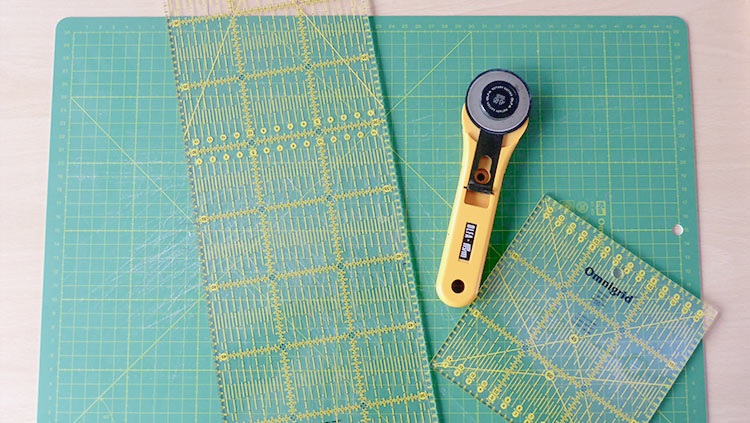
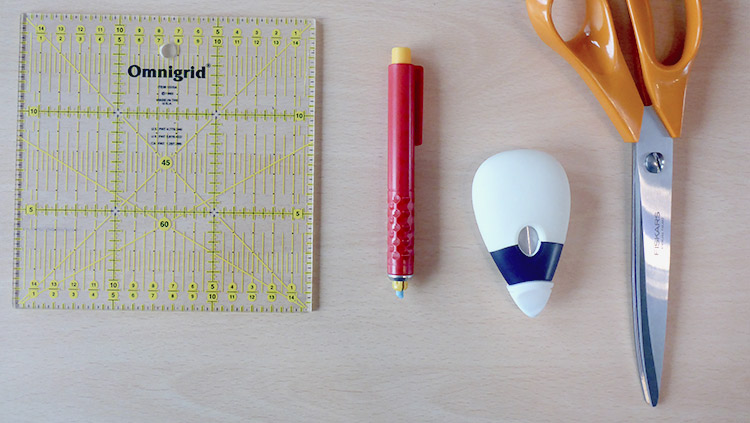
- Either: rotary cutter, self-healing mat & ruler, OR: fabric scissors, ruler, fabric marker or chalk
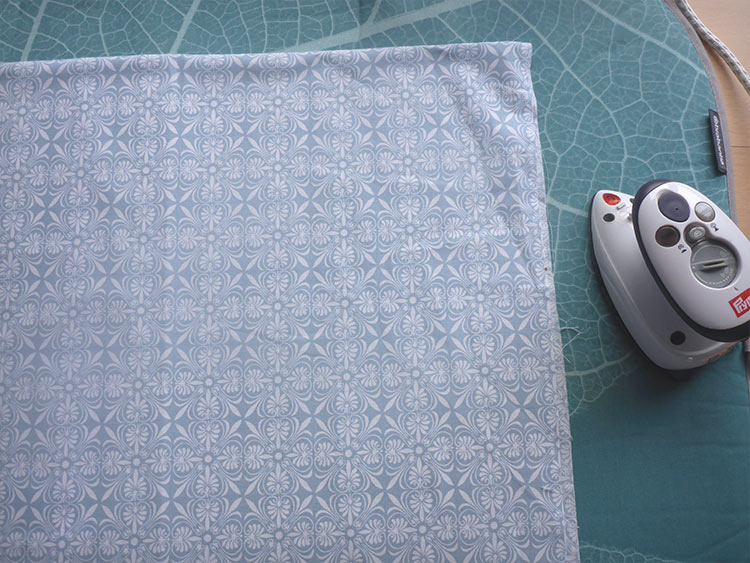
- An Iron
Personalize your perfect handmade label with Wunderlabel!
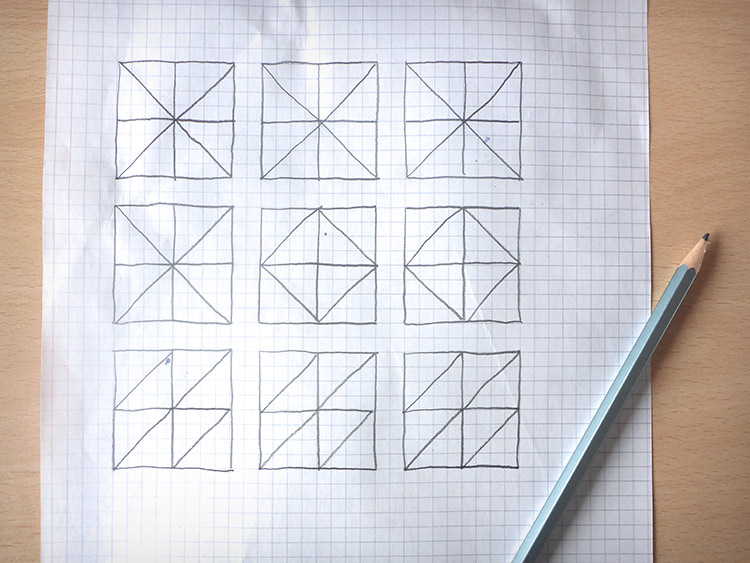
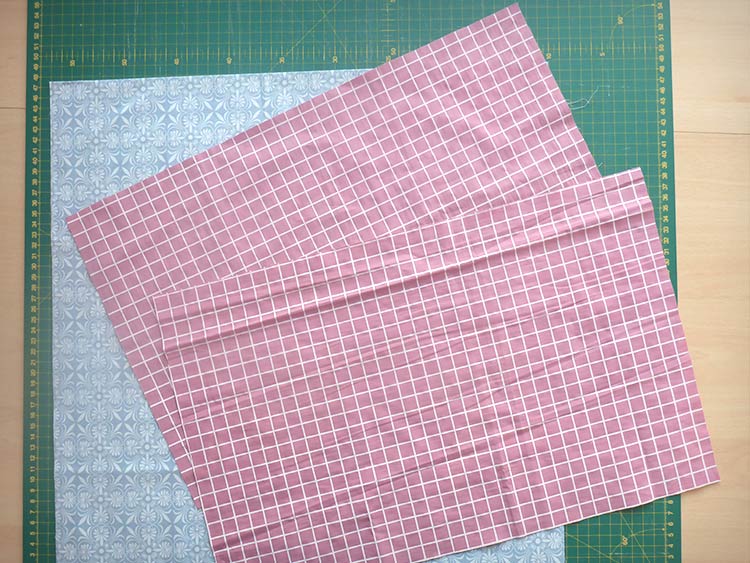
This month, we’re going to prepare the fabric for your throw pillow, so that they are ready to sew together next month. First, we’ll mock up the design so you can decide which fabric is going to go where. The basic design we’re using is a pinwheel made up of half-square triangles, which are square blocks made up of two triangles sewn together along the long side. This is a common basic quilt block and can be used in various ways to create a multitude of different patterns. Draw the outlines of the block several times, as shown below, so that you can trial a few designs to see what you like best. Use the gridlines to help make your blocks all the same size. You can even try turning some of the sub-blocks to make different patterns, as shown.
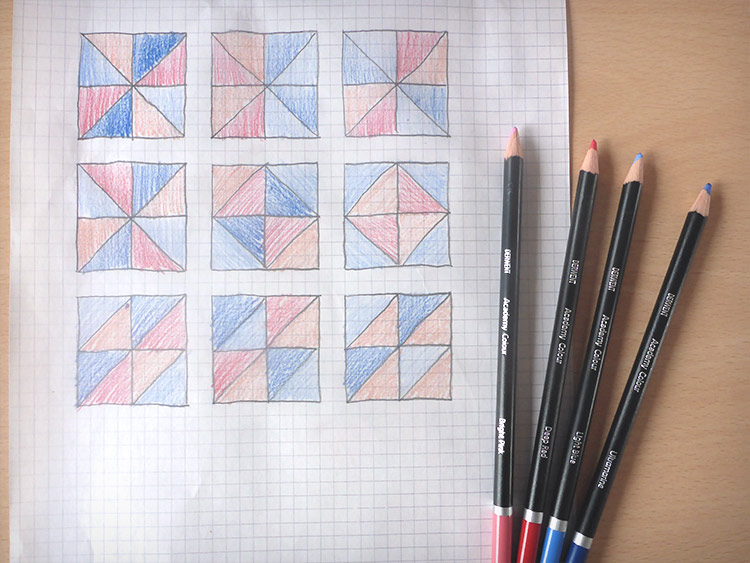
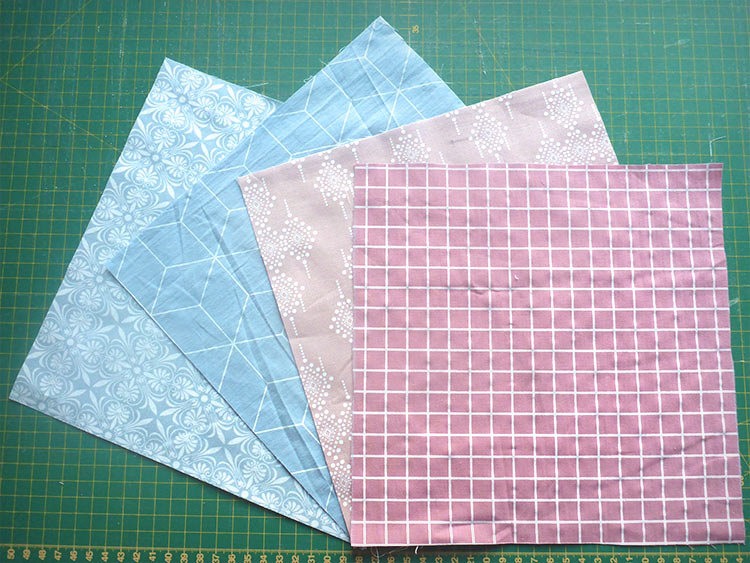
Use coloring pencils to shade the sections of the block according to your chosen fabrics. You don’t need to copy the fabric exactly, find the closest color match you can and shade harder for darker fabrics and lighter for more pastel shades. Once you’ve tried a few different layouts, choose a final design and note the number of triangles you’re going to need of each fabric. We are going to make the design on the far left in the middle row, so will need two triangles of each of our four fabrics.
Each triangle is half of a square of fabric measuring 25cm (10in) on each side (once seam allowance is taken into account, the final size will be just right for your pillow cover). So, if you have 2 triangles of a fabric in your design, you will need one 25cm (10in) square. For 4 triangles, you would need two 25cm (10in) fabric squares. If your fabric is creased or wrinkled, press it flat before cutting.
For cutting your fabric, there are two options:
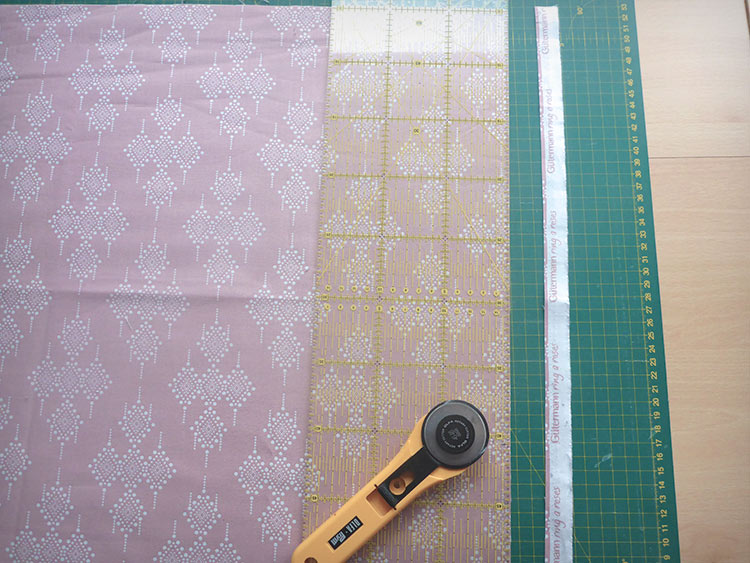
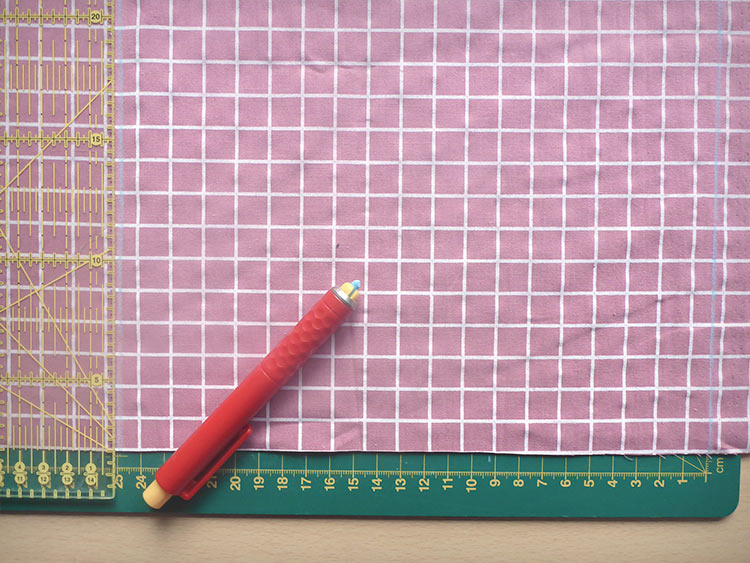
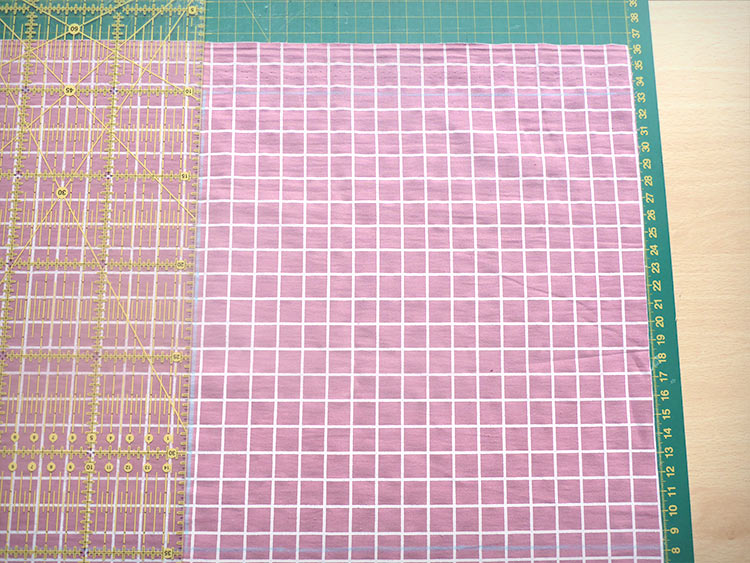
Option 1: rotary cutter. Unfold your fabric and lay it out flat in a single layer on your cutting mat. First, trim off the selvedge. Place your ruler parallel to the selvedge as shown below and trim it off – around 2-3cm (1in) is usually enough). Now use the markings on your cutting mat to cut a strip measuring 25cm (10in) wide. Trim off any loose threads or crooked edges, then cut as many 25cm (10in) squares as required. Repeat for all the fabrics you’re using.
Learn about selvedge here.
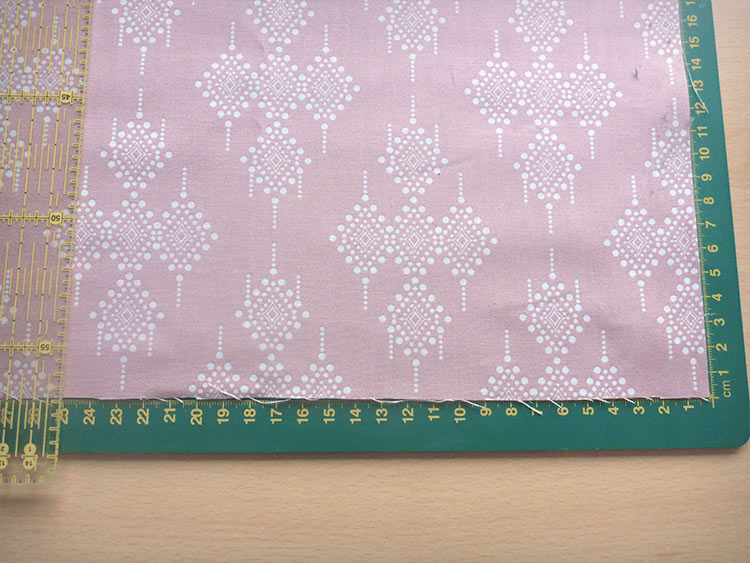
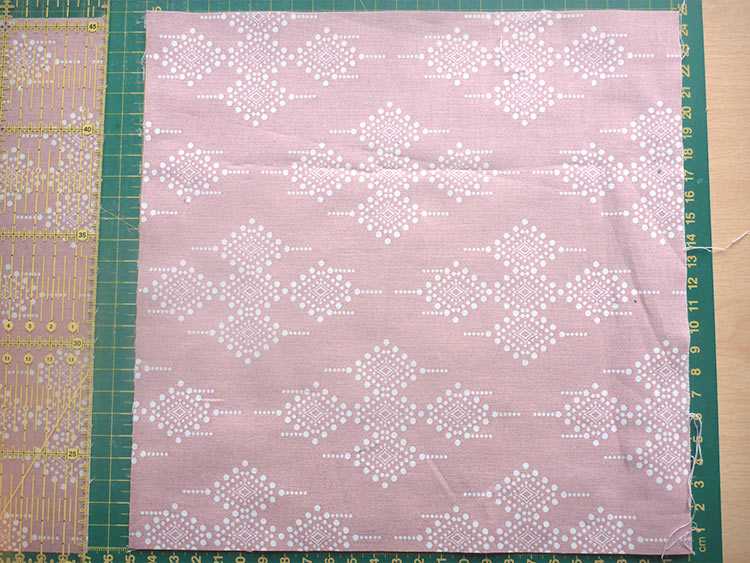
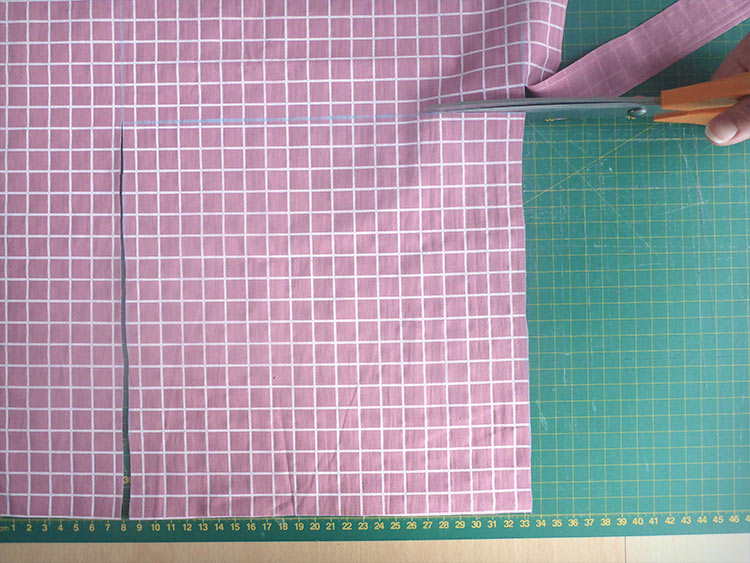
Option 2: scissors. Unfold your fabric and lay it out flat in a single layer. Use your ruler and fabric marker or tailor’s chalk to draw two parallel lines 25cm (10in) apart parallel to the selvedge. The first line should be just inside the selvedge. Now draw lines 25cm (10in) apart to create as many squares as you need for your project. Cut carefully and accurately along the lines. Repeat for all the fabrics you’re using.
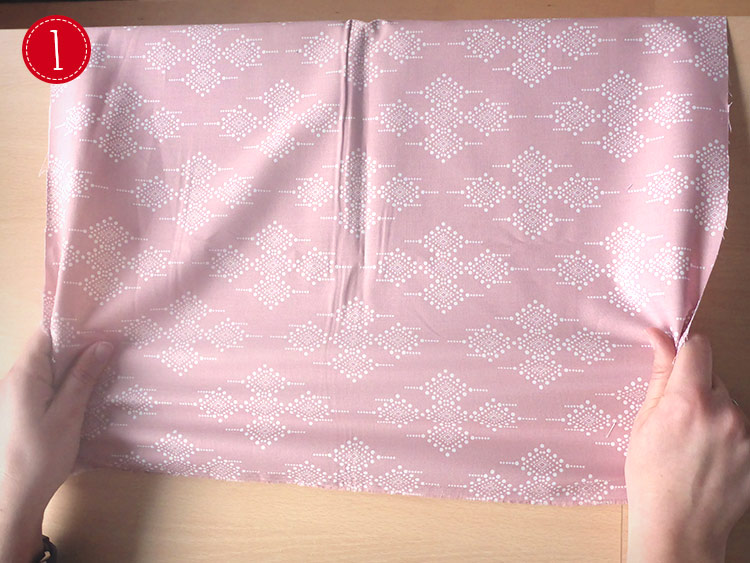
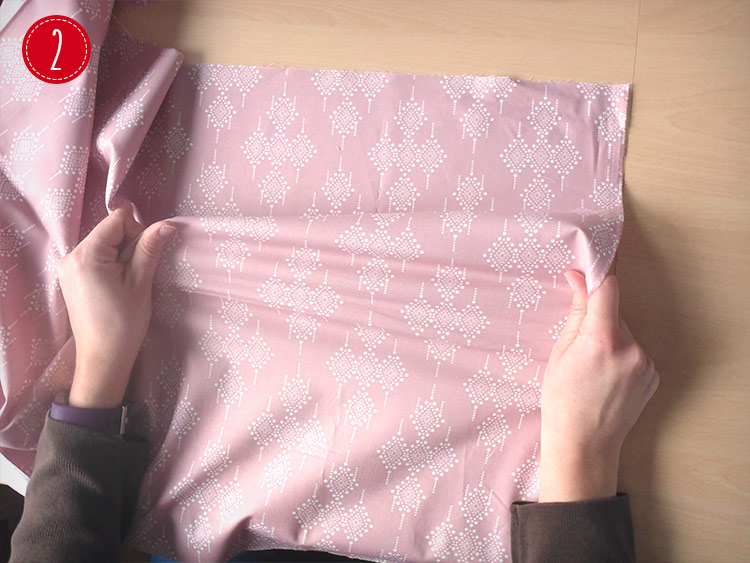
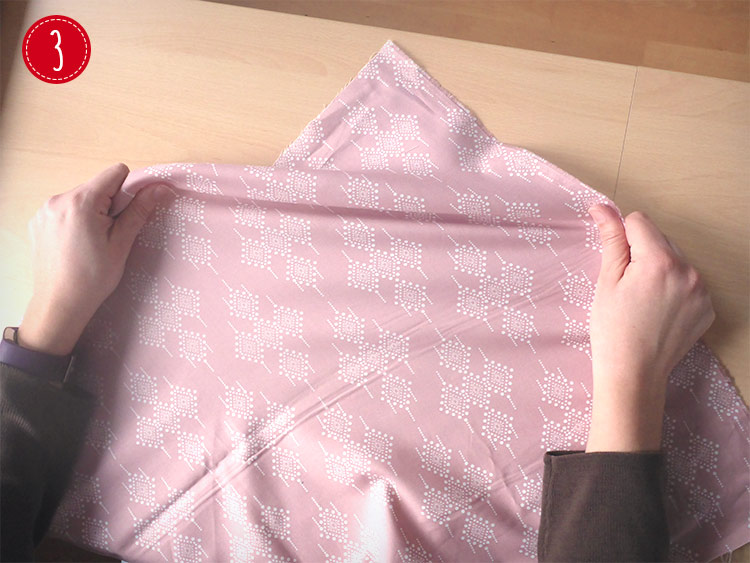
DON’T cut your squares into triangles yet, this will happen after they are sewn together. If you cut them into triangles already, the diagonal edges will be what are known as bias edges (picture 3). These are edges cut along directions on the fabric which do not run either parallel to or perpendicular to the selvedge. They are stretchier than either straight grain (parallel to the selvedge - picture 1) or cross-grain (perpendicular to the selvedge - Picture 2) edges, as you can feel if you try tugging on your fabric diagonally. This can cause problems when sewing them together, as they may stretch and distort the seam as you sew. For this reason, we will sew the squares together first and then cut them apart afterwards!
You’re also going to need to cut fabric for the reverse of the pillow and the backing for the quilted side. Using whichever cutting method you prefer, cut the following pieces of fabric:
*Two pieces each measuring 30cm x 47cm (12in x 18.5in) for the reverse of the pillow – you can use two different fabrics if you like
*One piece measuring 47cm x 47cm (18.5in x 18.5in) for the backing of the quilted side (will be inside the finished cushion, so you can use scraps of unwanted or ugly fabric if you happen to have any lying around!)
How to Make a Quilted Throw Pillow: Post 3: Sewing the Front
"Follow the easy steps to make a custom throw pillow of your own!"
In this post we will piece together and sew the front panel of our throw pillow. Let’s get started!
You will need:
- Your fabric from post 2
- A ruler and your favourite fabric marking method – either tailor’s chalk or a fabric marker
- Thread in a matching colour (we like to use a light grey, as it blends well with most shades)
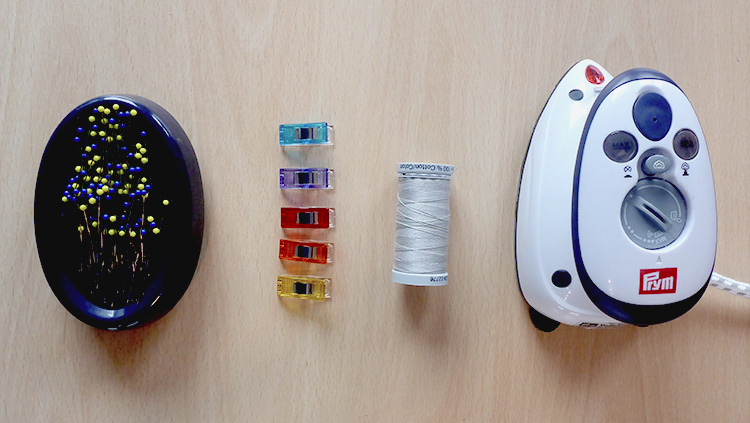
- Pins or clips
- An iron for pressing seams
- Scissors or a rotary cutter
Place your fabric squares right sides together in pairs as required by your design with all the corners lined up neatly. In the last post, we were planning to use the left-most design on the middle row, but have decided to switch to the left-most design on the top row instead. So in our case, this means that each pink fabric is paired with a blue fabric, with the lighter fabrics together and the darker fabrics together, since that’s how we want the triangles to be matched together.

On the wrong side of one of the fabrics, draw a line diagonally from corner to corner. DON’T cut along this line, you’re going to use it as a guideline for sewing in a moment. Pin your squares together a little way out from your line on both sides.


Sew along BOTH sides of the guideline, 0.75cm (¼ in) away from it. The “toes” of sewing machine presser feet are often this width, so you may be able to judge it by keeping the outside of the presser foot on top of the guideline and the needle in the centre position. On wider feet such as the walking foot we are using, there is often a marking showing a 0.75cm (¼ in) seam allowance, so you can line that up with your guideline instead.


Now cut along your central line and press the seams towards whichever fabric is darker in colour. You just made two half square triangles! Repeat for the other pair of fabric squares, so that you have a total of four half square triangle blocks


Place two of your blocks right sides together, as shown by your design. If there are seams which need to match up, sometimes it can help to pin these points directly to ensure they don’t shift while you sew. Otherwise, just pin or clip the squares together along the edge.


Sew this seam with a 0.75cm (¼ in) seam allowance, and repeat for the other pair of squares. Press the seams to one side. If you’re making a pinwheel like us, try to make sure that the seams all go in the same direction, as this makes it easier to match up the central point in the next step.


Now place your two sections together, again pinning any critical points (such as the centre of the pinwheel) and pinning or clipping the rest.


Sew together with a 0.75cm (¼ in) seam allowance and press the seam to one side. If you can, try to coax the seams around in a spiral at the centre so there isn’t too much bulk in any one spot, which would make quilting the cushion front trickier.


The top of your throw pillow front is finished!

Next step, we’ll be sandwiching and quilting the pillow front.
How to Make a Quilted Throw Pillow: Post 4: Quilting
"Change the look of your sofa or bed with a new throw pillow!"
You will need:
- Your pillow front
- The fabric you cut for the inside of the front of your pillow
- Batting (also referred to as quilt wadding)
- Pins – safety pins are best, but you can also use normal pins
- Thread
- Fabric scissors or rotary cutter, ruler and cutting mat
Choose the type of batting you want to use. There are various types, which all feel different to touch and will give a different look to your finished product. Your local quilt shop should be able to help you choose between the different materials. We’ve chosen to use bamboo batting, which is soft and breathable, as well as being a sustainable material. Cut a square of batting measuring 50 x 50 cm (20 x 20 in). We will cut it down to the right size when quilting is completed, to ensure the batting goes right to the edge of your pillow front.

Place your layers together – first the backing fabric, right side down, then the batting, then the pillow front, right side up. Smooth each layer out before placing it centrally on top of the layers below. This is known as the quilt sandwich.

Pin the layers together at regular intervals. For a project this size, you should aim to use around 15-20 pins to ensure the layers don’t shift as you’re quilting. Make sure your pins go through all three layers. Start your pinning from the centre of the pillow front and work your way outwards, checking that all the layers are free from wrinkles as you go.

Now you need to choose your quilting design and thread colour. There are an almost infinite number of options here, but if you’re a beginner it’s probably best to start with some simple straight-line quilting. We’ve chosen to use two different colours of thread to blend with each of our main fabric colours, and will echo the pinwheel shape with the quilting lines. You could also quilt straight lines right across the whole of the front, or try a grid pattern. It’s best to avoid designs which have you quilting right through the centre of your pinwheel, as there are more layers here. This can make it more difficult to push the project smoothly through your machine and may affect your stitch length.

Time to quilt! If possible, try to start quilting in the middle of your project, to allow any wrinkles to be smoothed out towards the edge. You can use the width of your presser foot to keep your lines an even distance apart or keep a consistent width between your quilting line and the seam lines of your design. Using a walking foot helps to keep the layers moving through the sewing machine together without shifting. Don’t forget to remove pins as you go – careful not to sew over them, as this could break your sewing machine needle, or even damage your sewing machine itself.

You could also quilt by hand – this is a very different process, and gives your finished project a softer feel. It’s also a skill which takes some time to perfect, as it looks best when the stitches are all the same size. If you’re hand-quilting, use a simple running stitch and make sure that each stitch goes through all the layers of your quilt sandwich to ensure that the layers are held together firmly.
If you run out of thread while quilting or need to end a line of quilting in the middle of the pillow front, you will need to bury the thread tails to prevent your stitches from coming unravelled. Thread a needle onto your thread tail, then tie a knot a short distance away from the surface of the quilt. Now take your needle into the fabric one stitch-length away from where the thread exits the fabric – the tip of the needle should be between the quilt layers, not coming out of the other side of the project. Come back up through the top of the fabric a short distance away from your quilting line and tug gently on the thread to pop the knot through the quilt top, so that it’s between the layers of the quilt sandwich. Now trim the remaining thread close to the quilt top. Repeat for the thread tail on the back of the project.


Trim the edges of the batting and backing fabric so that everything is level with the raw edge of the pillow front. Your quilting is complete! Next month is the last in our quilting series and we’ll be finishing our pillow cover.


How to Make a Quilted Throw Pillow: Post 5: Sew the Pillow
"It’s quick and easy - here are the steps."
The last steps to sew the pillow together.
In the last tutorial of our series "How to make a quilted throw pillow", we have to sew the pillow together.
You will need:
- Your quilted pillow
- front
- The back pieces for your pillow
- Thread
- An iron
- A pillow pad
- Leather Label from Wunderlabel
Fold one of the long edges of the back pieces to the wrong side by 1cm (3/8in) and press. Fold again to hide the raw edge, pressing once more. Sew close to the innermost folded edge to create a hem. Repeat for the second back piece.


Place the back pieces on top of the front piece, right sides together and with the raw edges aligned and the hems in the middle. One back piece should be lined up with the top of the front and one should be lined up with the bottom of the front. They will overlap in the centre. Pin or clip together all round the edge.


Sew all the way around the outside, using a 1cm (3/8in) seam allowance and pivoting at the corners with the needle in the fabric.

Trim the corners of your pillow cover close to the seam line and then turn the pillow cover the right way out. Add a pillow and then you’re all done!


Attach your label
Now it’s time to attach your label. We’re using a leather label with holes all four corners for this Project. It’s quick and easy - here are the steps.
Select the are where you’d like to attach the leather label.

One one side of the label, using the punched holes, pin the label into place.
With a needle and thread, start the stitch from the inside of the pillow. Sew up from through one of the holes and then down through the hole next to it (like sewing on a button). Pass through 4 or 5 times for a secure hold.

Tie off the thread on the inside of the pillow and cut off any extra thread. Repeat these steps on the other side of the label.


Finished!