"Check out this lineup of fun zipper projects, from the conventional to the quirky!"
One of the greatest things about being a sewist is getting to play with all kinds of materials and learning how to use them in unexpected ways. Take the humble zipper, for instance. Sure, you can use them to make it easy to get in and out of a dress, or to finish off a stylish new coat. But what about using them to embellish that dress, or as a cute bracelet or headband? Having ways to upcycle zippers is always a great idea, especially if you do alterations or overhaul garments into something fun and new. Check out this lineup of fun zipper projects, from the conventional to the quirky!
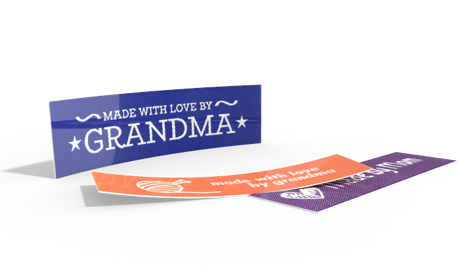
Discover all the possibilities with our clothing labels!
Basic Zipper Pouch
This is one of the best projects out there for anyone who's just getting into using zippers for their generally intended purpose—as an easy-open, easy-close fastener. These zip pouches are perfect for practicing how to set different kinds of zippers and how different materials can change how you work. Need some basic tips on how to prepare for and set in a zipper? Check out this handy resource! It's got everything you need to know about choosing and using zippers.
Ultimate Zipper Pouch
One zipper's nice, but how about three? Or four? Or an entire pouch made of zippers? The ultimate zipper pouch consists of zippers sewn in parallel to one another to create the front and back panels for the pouch. The best part? They're all functional! Mix and match colors for a striped appearance, or go monochrome with natural fiber zipper tapes with metallic teeth.
Dopp Kit
Made from sturdy canvas or soft leather and tough metal zippers, a handmade Dopp kit is a great gift for the men in your life, or as an addition to your usual craft show lineup. The tough material can pose a bit of a challenge, so make sure you're using heavy duty needles and thread, and work slowly. When working with leather, it's especially important to make sure every seam is lined up and ready to go before you start sewing, because every wayward needle mark will show.
Zipper Tee
One of the most popular DIY clothing upcycles is making over t-shirts into fun and trendy new looks. For this bold upcycle, use a tee that's a little large for a soft and slouchy look. Cut across the top of the shirt, removing the collar and slitting the sleeves and shoulders open along the top. Even out these cuts so you have two roughly straight edges along the top of the t-shirt. Install a two-pull zipper along the top of the shirt, and pull the zippers into place to leave an opening for the neckline. If desired, whip stitch around the zipper teeth to keep the zipper pulls from drifting too far and distorting the neckline while you're wearing it.
Easy Zipper Bracelets
This is a great quick and easy project for kids. You can use colorful zippers bought specifically for the purpose, or upcycle those you've removed from old garments. Measure your wrist and cut the zipper to length, making sure not to discard the zipper pull. Ribbon end clips, designed for jewelry made with velvet ribbons or other wide material, make the perfect closure because they clamp onto the zipper tape and keep it from coming apart at the ends. Add a lobster-claw clasp for a classic look, or magnetic clasps for an easy-on, easy-off bracelet, and your new accessory is ready to go! You can add additional embellishment, like lace trim, beading, rhinestones, and more to suit your personal style.
Zipper Embellishments
More and more we're seeing zippers used to create fun and interesting shapes, and not just in garments! Zippers can be used to form rosettes and leaves, geometric patterns, ruffles, and more. The teeth provide an interesting texture, and help maintain the embellishment's shape in ways you can't match with simple strips of fabric or woven tapes. Most zipper embellishments are built by stitching or gluing the zipper tapes to themselves to form the desired pattern, but you can also stitch them onto a substrate (like felt or another sturdy backing fabric) to create your patterns. Feel free to get creative! Flowers and ruffles are common shapes, but there are also crafters using zippers to create dragonflies, shells, and more!
Magic Zipper Coin Purses
This is one of those projects you almost have to see to believe. With the help of a zipper, a flat piece of ribbon turns into a 3-D, tetrahedral coin purse. It's like a magic trick, but you won't have to practice for hours in front of a mirror to get it right. Check out this tutorial to learn how to make your own!
Busy Board for Toddlers
Kids love learning about the things around them, and sometimes, that gets them into trouble, with fingers shut in cupboard doors or near misses with electrical sockets. Spare your sanity and give those curious kiddos a safer way to explore with a busy board! These boards include fun sensory and motor skill activities like oversized buttons, Velcro strips, hinges and latches, and, of course, zippers! Make sure that everything is securely attached to the board and that there are no sharp edges or loose fasteners that could pose a hazard.
Zipper-Toothed Monster
Monsters aren't so scary when they're handmade stuffed friends! Cute and cuddly, these stuffed toys make great stash busters for all the bits of interesting material you've got lying around, plus those odds and ends fun trims and embellishments that aren't quite enough for larger projects. Use zippers to create toothy smiles for your cuddly monsters; for bonus points, add a hidden pocket inside the monster's mouth so they can protect your kids' favorite treasures while they're away. As always when sewing projects for children, make sure the materials you use are age appropriate. Buttons or facial features that can detach pose a choking hazard for young children.
Headbands
A quick and easy project with trendy flair. All you need is a zipper and a length of soft elastic the same width as your zipper tapes. Simply measure for your headband's size, then stitch the zipper ends to the elastic for a comfortable fit. Wear zipped or unzipped! You can even add multiple zipper tapes together for a wider band; vary the direction the zippers open for a fun zig-zag effect.
Zipped Pillow Covers
This might be a more conventional use for zippers, but boy is it a convenient one! Pillows and cushions are one of the easiest ways to change the look of a room, so if your house feels in need of a bit of sprucing up, but you're not ready to commit to new paint or new furniture, whip up some pillow covers for a facelift that's as permanent or temporary as you want. Zippered cases can be made to fit close to your cushions for a professional finish, and, maybe best of all, they're easy to remove and toss in the wash when it's time for a quick freshening up.
Sweatshirt with Exposed Zippers
Zippers don't need to be functional to be fashionable. They're popping up in all kinds of places, like the bottom hems of sweatshirts and the cuffs of athletic pants. When working with materials like these—typically stretchy knit materials—use a walking foot on your sewing machine to help minimize warping and curling once the zipper is installed. You can also use fusible interfacing to stabilize the area where you plan to add your zippers before cutting. Keep in mind that when you're adding decorative exposed zippers that it's easiest to install them in seams, or, barring that, in straight segments rather than following curves. You'll lose a bit of fabric to seam allowance when installing zippers outside of seams, so be prepared for the fit to change slightly.
Hidden Zipper Infinity Scarf
This is another craft show favorite, and, like most infinity scarves, it's quite easy to make. It works best with heavier materials, as lightweight fabrics are too flimsy to handle the stress of regular zipper use. While you can certainly use an exposed zipper for contrast and visual interest, if you want the pocket in your scarf to be truly hidden, use an invisible zipper. Cut two rectangles to the desired length and width, keeping in mind that they'll be stitched together along the narrow edge to form a loop. Install your zipper along a short section of one of the long edges, then complete the seam so the rectangles are joined at the long edge except for the zippered opening, leaving you with a larger rectangle. Lay the narrow ends together (right sides in), and stitch to form a loop, then bring the remaining edges together and sew. You can now use the zippered opening to turn the project right side out. To keep items in your secret pocket from drifting, stitch the layers together to seal off the portion of the scarf below the zipper.
Plan on making a few of these fun zipper projects? You'll need a label to emblish you design!

