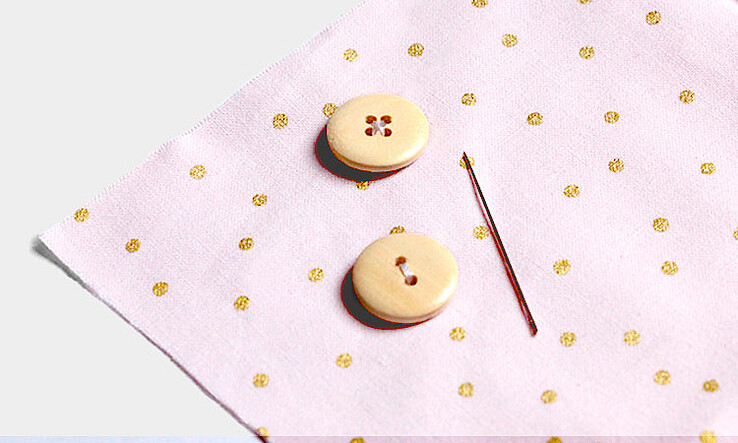
You’re rushing to get dressed in the morning when you hear something fall on the floor: One of your buttons has come off your favourite blouse! What now? How do you sew a button back on? For sewing enthusiasts this is not a problem and only takes a couple of minutes.But even they had to learn the basics before becoming proficient. We have created the ultimate beginner-friendly “How to Sew on a Button” tutorial.
What different ways are there to sew a button on?
There are different approaches and tricks to attaching a button. Some depend on the type of button, others are variations and depend on the materials you have at hand. In this post we will first show you a few instructions by button type, followed by instructions by technique.
How to Sew on a Button - By Button Type
How do you attach buttons with 2 holes?
This is the conventional method of attaching buttons. Simply stitch through the fabric and through the holes in the button.
How do you sew a button with 4 holes on?
The method is the same as with 2 holes but buttons with 4 holes will hold faster and be less likely to fall off.
How to sew a shank button on?
This technique is generally used when working with thicker fabrics. The eyelet makes the button easier to close and prevents it from tearing off.
How do you attach a button with a thread shank?
While the sewing technique is the same as for the shank button you will be using a standard button for this. It involves putting a match between the button and the fabric to create a gap. The match is then simply removed after sewing.
How do you sew a button with a stay button on?
A second button is attached on the wrong side of the fabric and sewn on at the same time as the front button to ensure that the thread does not rip through the fabric.
How to Sew on a Button - By Method
Attaching a button with a sewing machine: Practically every sewing machine has a special sewing foot for attaching standard buttons or buttons with thread shank.
Sewing on a button by hand: This is a quick and easy method using needle and yarn. Choose your yarn based on how strong it needs to be and to match the color and texture of your fabric.
Tutorial: How to Sew on a Button by Hand or with a Sewing Machine
Here is how it’s done:
Material:
- Your sewing project
- Interfacing to reinforce the fabric - we used G700 by Vlieseline but you can use the non-woven fabric of your choice
- A button (or several!)
- Matching sewing thread
- A needle
- A pair of scissors
How to sew on a button
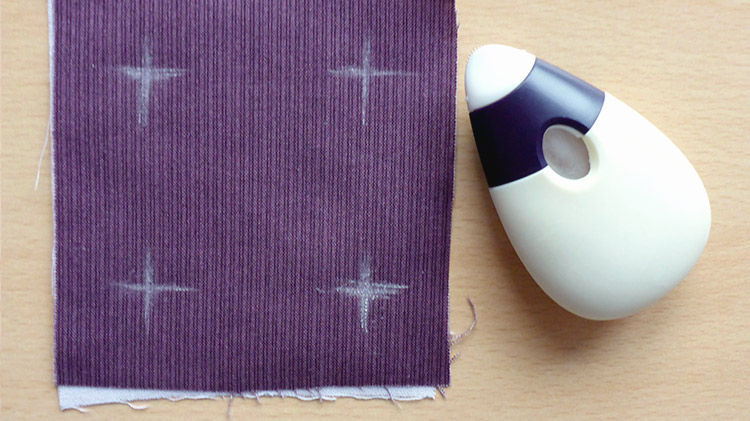
The first step is to reinforce the fabric. Cut off a small piece of interfacing and iron it onto the reverse side of your fabric - where the button will be sewn on - following the manufacturer’s instructions. Mark where exactly the button should go. If you are working with a sewing pattern then make sure you adhere to the instructions provided. If you are mending an item of clothing, whether it’s the button placket, waistband or sleeve, make sure you close the tear first. Then place the button on top of the fabric and mark the position through the buttonholes with some chalk.

There are two methods for sewing on a button: Either by hand or using a sewing machine.
→ How to sew on a button by hand
We will start by showing you how to sew on a button by hand. Thread your needle and make a knot in the end of the thread. Then stitch through the fabric from the bottom and into one of the button holes. If your button only has two holes then simply proceed to stitch through the second hole and back down into the fabric - this is your first stitch.


If the button has four holes then you can either stitch two parallel lines by alternating stitching into two holes lying next to each other, or you can choose to create a cross pattern by alternating stitching into the holes lying diagonally opposite each other. No matter if you are working with two or four holes, just keep repeating the stitches until the button is securely attached. Be careful not to pull the stitches too tight so that the button can still easily be closed. Finish off by tying a knot in the thread at the back of the fabric and cut off the excess.


→ How to sew on a button using a sewing machine
You will need a sewing machine for the second method. You can use a zigzag stitch or the button sewing setting on your sewing machine, if there is one. Set the stitch width so that the needle will go exactly through the button holes. You can check this with the dial on your sewing machine - the distance between the holes is usually standardised. If you are using a zigzag stitch then set the stitch length to zero. Start by sewing through one of the holes a few times to anchor the stitches. Then stitch in zigzag until the button is secure. To finish, sew a few more stitches in place so that the stitches don't come undone. If you are using the button sewing setting then all you need to do is adjust the stitch setting, if necessary - everything else happens automatically. All that’s left to do is cut the ends of the thread off.

One last tip: If your fabric is thicker then use a couple of matches to make sure that the button will close properly after sewing. Just place them between the button and the fabric and sew as described above. Remove the matches afterward and you’re done. This creates a bit of a gap and allows the button to move so that it can be closed securely. There are also special sewing feet on some machines that can be adjusted in height for thicker fabrics and leave more room between the button and the fabric.

How to sew a button on pants, jacket, shirts and more should no longer be a problem for you!
If it’s not perfect on the first try just remember that we all have to start somewhere. Just keep practicing! When you have mastered sewing on buttons you can move on to attaching personalized labels. We show you how it’s done in our blog with an easy tutorial.
We hope that our How to Sew on a Button guide will help you with any button-related emergencies in future!
Don't miss these blog posts from Wunderlabel:
How to Sew Size Tags onto Your Clothes
Do You want to save this idea for later?
Simply bookmark the link to this blog post or add it to your "Favorites" so that you can quickly find it in your browser later.
Here is how to save the tutorial:
- On your computer: Click on the asterisk or the three dots in the top right hand corner or on the book icon in the top left hand corner (depending on the browser you use).
- On your Android smartphone: Click on the three dots in the top right hand corner and then on the asterisk.
- On your iPhone: Click the book icon at the bottom and add the link to your bookmarks or book list.
