Vinyl is a versatile material with all kinds of applications, from water resistant outdoor projects to easy-to-clean home decor. Like any specialty fabric, though, it has some quirks and takes a bit of getting used to, especially for sewists who are unfamiliar with this material. Here's what you need to know to get started.
Discover types of fabrics at Wunderlabel!
What is vinyl?
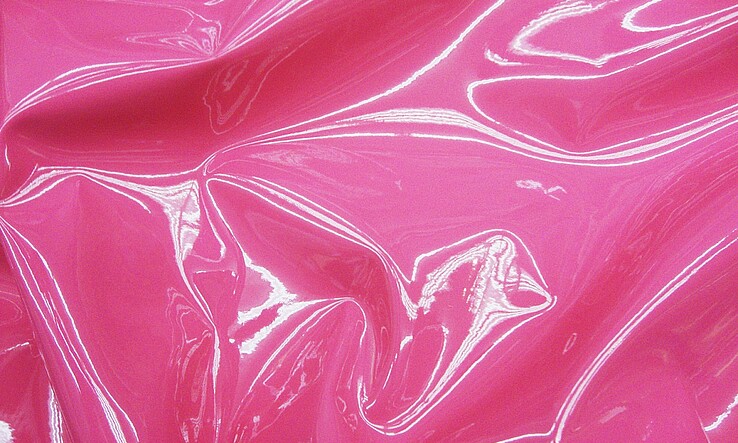
"Vinyl" has become a catch-all term for any material that's made of or has a plastic layer adhered to it. This includes everything from the clear plastic sheeting used to make see-through bags to the oilcloth used in rain gear to the faux leather that many prefer for garment making. Though each of these has its own unique properties, they also share many similarities, and understanding how to treat one type of "vinyl" can help you decide how to work with others. Here are some of the materials you may encounter:
- PVC- Polyvinyl chloride, or PVC, is your true vinyl fabric. It's tough, resistant to water and UV damage, and great for outdoor use. Typically, you'll find heavier materials with a mesh or fabric backing for extra stability, though you can find some, like transparent vinyl, that are purely plastic.
- Oilcloth- Traditional oilcloth was made of lightweight canvas treated with linseed oil and wax to make it water-resistant. Today's version is a thin fabric treated with a layer of PVC to provide even better waterproofing.
- Laminated Fabric- Like oilcloth, laminated fabrics are made with an underlying fabric material, often cotton, that's been treated with polyurethane to make it water-resistant. Of common vinyl materials, laminated fabrics are the ones that behave most like a traditional fabric, soft and flexible without the stiffness of other options.
- Pleather- This synthetic alternative to leather offers a whole range of textures, colors, and weights to mimic the look and feel of authentic hide, but without the expense or ethical concerns.
Don't confuse vinyl fabrics with craft vinyl, which is an adhesive material that can be cut into all kinds of fantastic shapes and attached to your projects using either pressure (if you're using sticker vinyl) or more permanently using heat and iron-on vinyl. While iron-on vinyl can certainly be used to embellish sewing projects, it's not appropriate for sewing itself.
What can I use it for?
With so many different types of vinyl to choose from, there are countless ways to use it. Add waterproof liners to beach bags, or create tablecloths or placemats that wipe clean with just a damp cloth. The UV-resistance makes vinyl an excellent choice for outdoor upholstery, awnings, and indoor/outdoor curtains. Faux leather is used in everything from accessories like handbags to garment design and upholstery, depending on the weight. When it comes to vinyl, the sky's the limit, especially with these tips and tricks under your belt.
Tips and Tricks
A Standard Presser Foot Won't Do
Vinyl has a tendency to be sticky, which means it gets caught under a standard presser foot, causing tangled stitches and mangled seams. Instead, opt for a walking foot, which has feed dogs to help push both layers of material under the needle at the same time, a roller foot, which has the added advantage of helping to press your seam as you sew, or a Teflon or non-stick foot, which has a coating on the bottom to help it slide easily over even the stickiest of fabrics.
Don't Forget to Prepare Your Fabric!
Most vinyl shouldn't be thrown in the wash like standard fiber materials, but that doesn't mean it shouldn't be prepped before you start cutting and sewing. Some materials can (and should) be washed to prevent sizing issues. Be sure to check the manufacturer instructions and determine whether your material is dry-clean only! Other materials may need to be hung or gently warmed to remove creases or other storage marks. Since this process can change the size slightly, it should always be done before measuring and cutting.
Adjust Your Stitch Length
Vinyl fabrics are too tough for tiny stitches. If you notice your threads tangling or breaking, or if your machine keeps skipping stitches, try switching to a longer stitch length. Three millimeters is a good rule of thumb, but you'll likely need to run some tests before you can determine what will work best with your particular material.
Choose a Heavy Needle
Plastic-coated materials are definitely not for your lightweight needles. The "stickiness" of the fabric puts more stress on your needle than you might expect, even for relatively thin vinyl. Switch to a denim or leather needle for best results.
Don't Pin Your Material!
One of the trickiest things about vinyl and other plastic-coated materials is it's habit of showing every single pin and needle mark. There's no discreetly removing a misplaced seam and hoping no one notices. Plus, all these tiny pin holes can really put a damper on your fabric's waterproofing—no pun intended. Instead, use alternatives like sewing clips, or, in a pinch, you can even raid your office supplies and grab some miniature binder clips to keep everything in place.
Avoid Ironing
Plastic and irons don't mix well. The fastest way to ruin your fabric—and maybe even your iron—is to try ironing a laminated fabric or other plastic material. The water-resistance makes them less susceptible even to steam, but if you've got some tough wrinkles or folds that you can't finger-press away, don't despair. Instead of reaching for your iron, grab a hairdryer. On a low setting, it will provide just enough heat to relax the fabric and let the wrinkles settle without distorting or discoloring your material.
Grab Your Mallet
If you can't iron, how exactly are you going to manage all these bulky seam allowances? Well, grab your trusty rubber mallet and get started! Pounding the material flat with a soft rubber mallet provides the same benefits of pressing your seams as you sew, but without melting your material and with the added benefit of providing some serious anger management opportunities!
Choose Thread to Match
Picking out the right thread for your material can be a bit tricky. Not all vinyl fabrics require a heavy-duty thread, but some work best using only industrial-strength. So where does yours lie? Think about not only the weight and strength of the vinyl itself, but also of how the finished project will be used. A garment probably doesn't need industrial-strength stitching, but it's pretty important not to have threads coming undone while it's being worn. A heavy-duty thread is probably best in this situation. Making vinyl placemats? The side seams and top stitching aren't going to be called on to resist much direct wear and tear, so a standard thread weight would be appropriate.
Store On a Roll
Of course, the easiest way to deal with wrinkles in your vinyl is to avoid them entirely. The best way to do this is to store your material on a roll rather than folding it with the rest of your fabric stash. No room for cardboard cores? Try hanging your vinyl vertically, using skirt hangers with clips. Loosely form the vinyl into accordion folds, then hang so that the folds run vertically, pinned in place by the skirt clips on the hanger. Though it's not quite as effective as rolling your vinyl, it will prevent the worst of the creases caused by storing your folded vinyl on a shelf or in a box.
Mark Seams with Tape
Since pins are out as a marking material, and because the waterproofing of many vinyl fabrics wreaks havoc with erasable markers and other marking utensils, one of the easiest ways to mark your seam lines and other important pattern details is probably lurking in your DIY closet right now: painters' tape! It's easy to apply, flexes with your fabric so it stays put until you move it, and, when you do peel it away, it comes up without leaving sticky residue to wash away.
Choose Your Pattern Wisely
Choosing the right pattern to use with vinyl fabric is half the battle. Like any bulky fabric, opt for items with few overlapping seams to minimize the bulk and stiffness of heavy seam allowances. For garments made of or including vinyl, always do your fitting on a toile, or practice garment, that will allow you to make any necessary alterations without putting needle marks in your finished garment. Since vinyl doesn't tend to breathe or stretch, avoid very snug-fitting or highly tailored garments, as they can be uncomfortable to wear as well as difficult to execute well.
Practice, Practice, Practice
This is the real key to getting good at working with vinyl—or any other sewing technique, for that matter. Always test out your sewing machine settings and sew a few practice seams when working with a new material. Try making simple, or familiar projects first, so you know what to expect from the pattern. Try not to get too frustrated with any errors you might make at first. Before you know it, you'll be a vinyl-sewing pro!

